

How to Claim Worbli Tokens and set up an account
Join us as we run through the WORBLI claiming process and how to add your WORBLI account to Scatter. This will be a simple, step by step tutorial without information overload.
- Where to claim Worbli Tokens
- How to Add Worbli Network in Scatter
Essentials before progressing:
You must of held an EOS account before the snapshot on 11:59 PM UTC September 7th, 2018.
Step 1: Complete your KYC
First you need to complete your KYC at WORBLI. If you have already done this, go to Checking Snapshot.
If you have not signed up or joined WORBLI, please do so as KYC is an essential part that will grant you your tokens. KYC stands for Know Your Customer and this is due to regulations based on fraud attempts from individuals. KYC acts as a security barrier and helps determine the individual ownership of an account or set of accounts.
Feel free to join the WORBLI Telegram Channel if you have any additional questions.
Step 2: Checking Your Worbli Snapshot
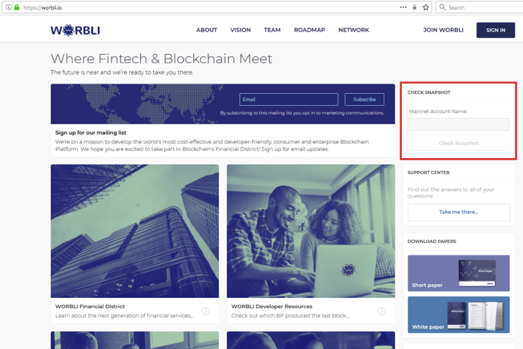
At WORBLI, their official page allows you to check the balance of your account. Head over to WORBLI and find “Check Snapshot” in the top right area of the page. See image below & look for the Red Box highlighted.
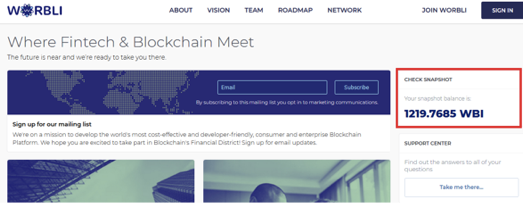
Enter your EOS Account into the Mainnet Account Name box. Click Check Snapshot button. Your WORBLI Token balance will appear as seen in the image below.
Step 3: Brief Scatter Tutorial
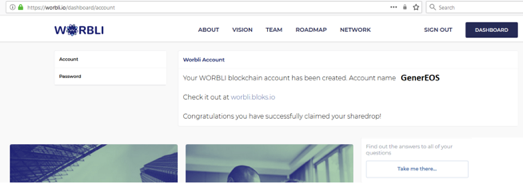
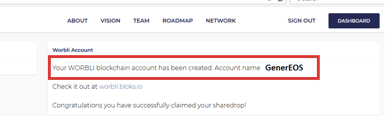
Assuming that KYC has been completed and you have been greeted with this screen after creating your WORBLI account name. See below. It’s time to head to Scatter.
As Scatter is constantly getting updated, with this tutorial I have used Scatter (v10.0.3). If not downloaded already, I suggest heading over to Get Scatter for the latest update.
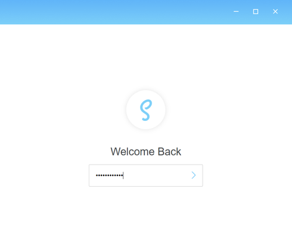
Log into Scatter by entering your password.
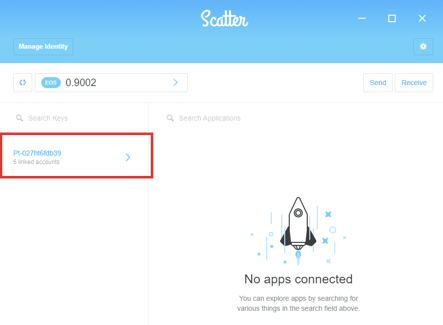
Click on your “Keys” that have already been added to Scatter. It may appear something like this for newcomers or for people who have just recently upgraded Scatter. See Image Below.
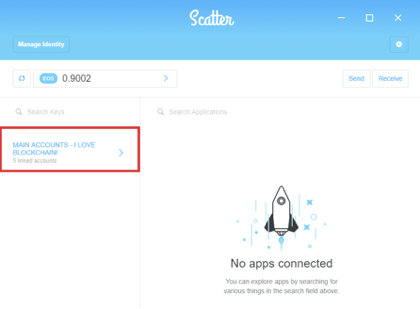
Regular users of Scatter who have been able to keep up with the transitions, may have Renamed their Keys. As seen in the Image below. This is not to change your “Keys”, but as a reference or a name within Scatter for user’s keys. People have numerous accounts which can be renamed to be more easily identified within Scatter.
We now add the WORBLI Network and then add our WORBLI Account. In our tutorial for example, it’s the “GenerEOS” account. See Image below.
Note: This screen is after KYC has been completed and the user has given a name to their WORBLI account.
Step 4: Adding the WORBLI Network
Go to Scatter and click on your Keys as highlighted by the Red box.
Click on Add Account as indicated by the Red box.

The good thing with Scatter is that you don’t have to manually Add the network details, it’s already set up. Take note as WORBLI accounts only have access to 70% of their tokens at this stage.
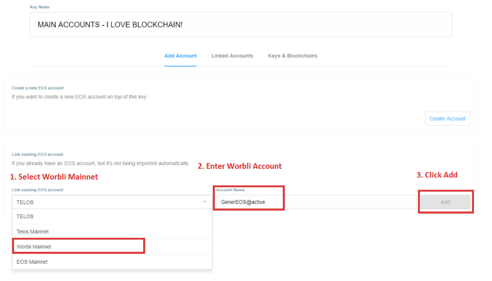
1. Click on the dropdown box as shown by the Red box highlighted, select WORBLI Mainnet.
2. Then over to the right, add in your WORBLI account name. We strongly suggested for users to use @active rather that @owner. In this case we used GenerEOS@active.
3. Click on Add
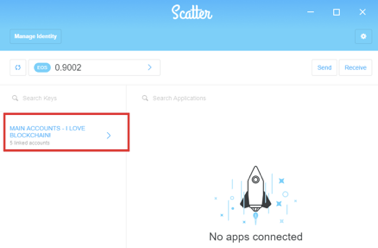
Once done, you will be taken back to the Linked Accounts page. Scroll to the bottom and you will find your WORBLI Mainnet Account has been added. We can compare your account to others indicated by the Blue highlights. You will notice that one says EOS Mainnet and the other says Worbli Mainnet.
Clicking on Token, in Red highlight will show the balance of your WORBLI tokens.

Congratulations you have now claimed your WORBLI & added the WORBLI network to your Scatter! You can now send your tokens to Chaince for example or other Exchanges that support WORBLI.

0 Comments