
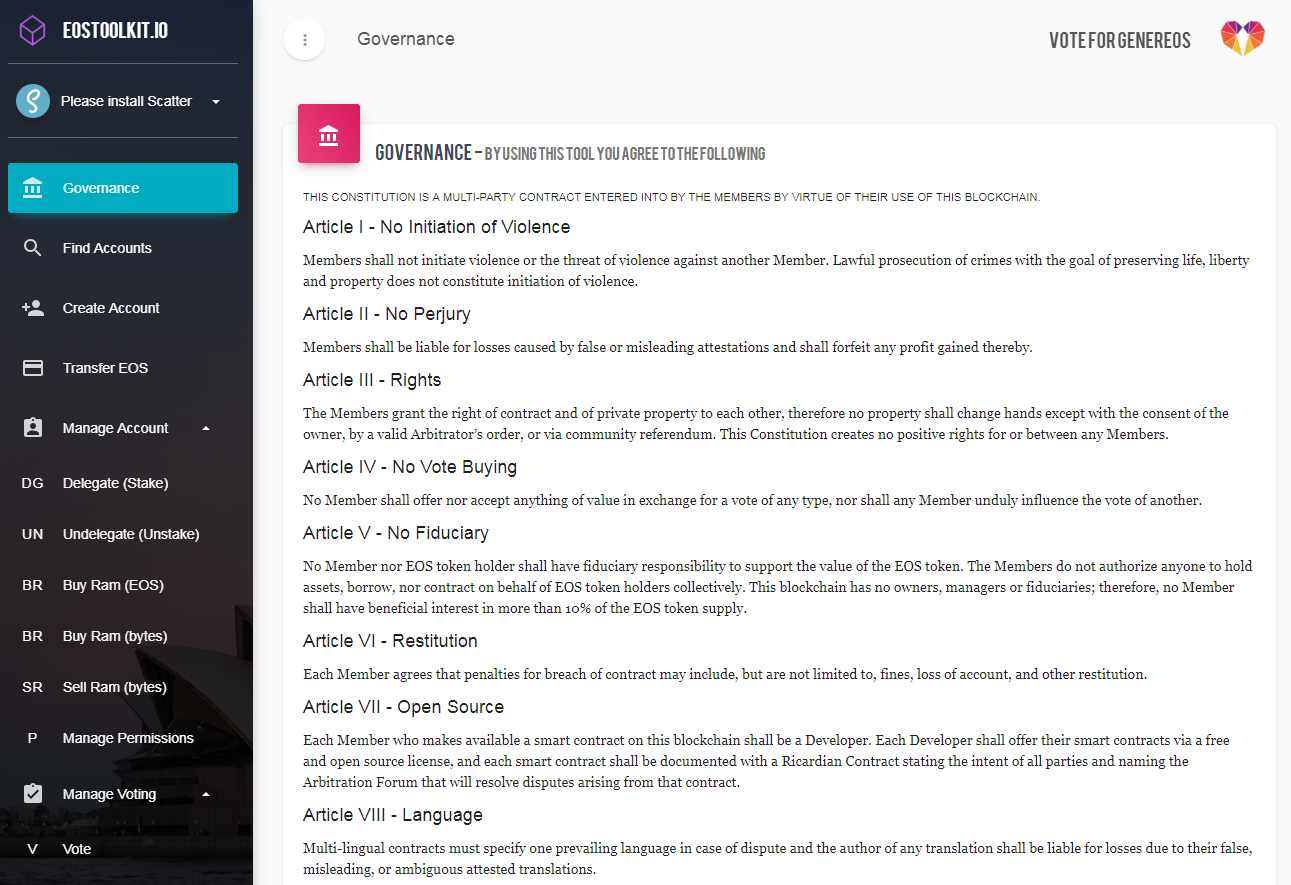
EOSToolKit.io – Your Complete EOS Tool Suite
Existing Features:
- Balance Check
- Account Creation
- Premium Name Bidding (classic toolkit only, not yet ported)
- Name Auction Tracking (classic toolkit only, not yet ported)
- Proxy Setup
- Vote for us (classic toolkit only, not yet ported)
Click here for a tutorial on how to use the above features
EOSToolkit.io is a web based application developed with Scatter signing so you can trust that your private key is kept safe and secure at all times. If you’d prefer to review the code yourself you can find Scatter here.EOSToolkit here
New Features:
- Staking/Unstaking
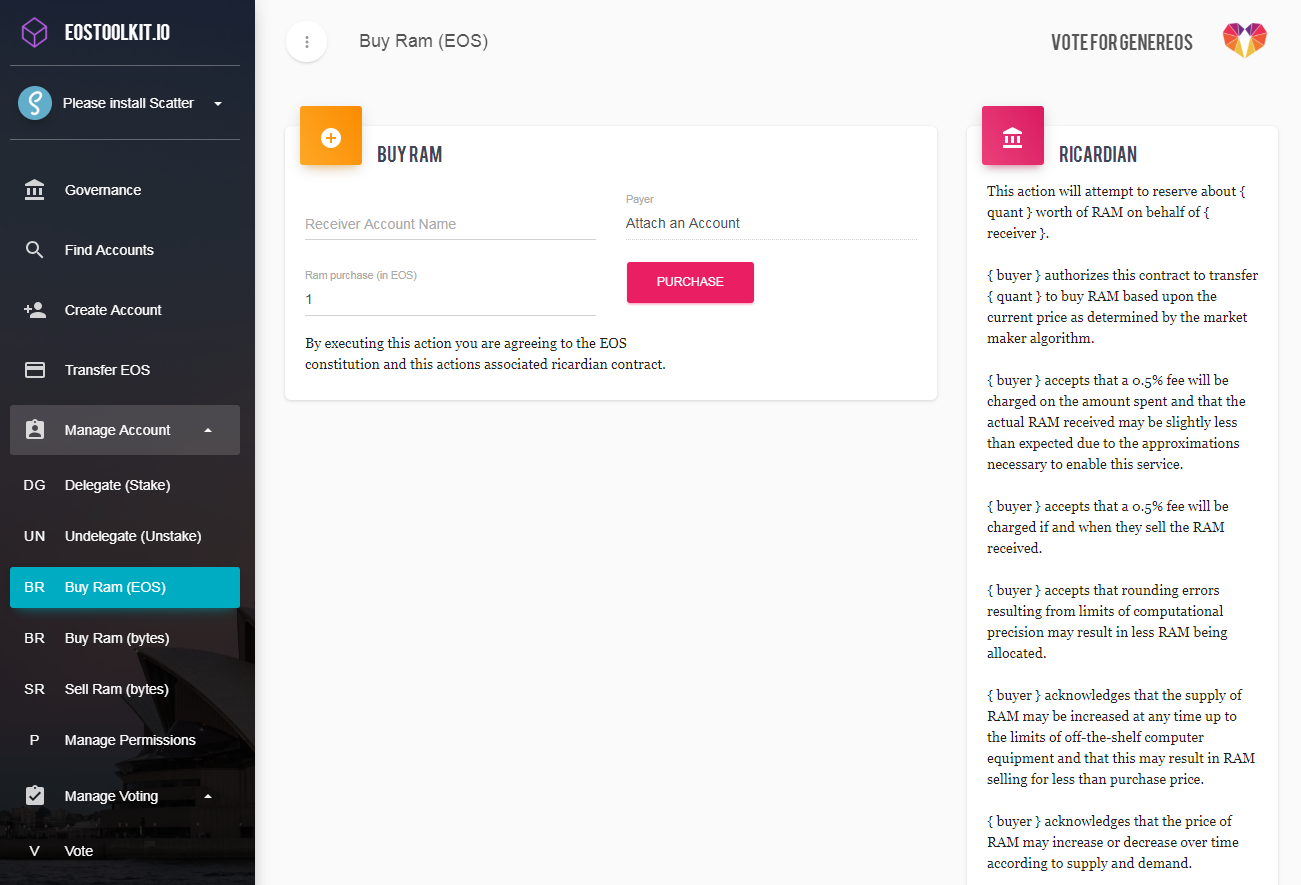
- RAM Buy/Sell
- Permissions Management
- Transfer EOS
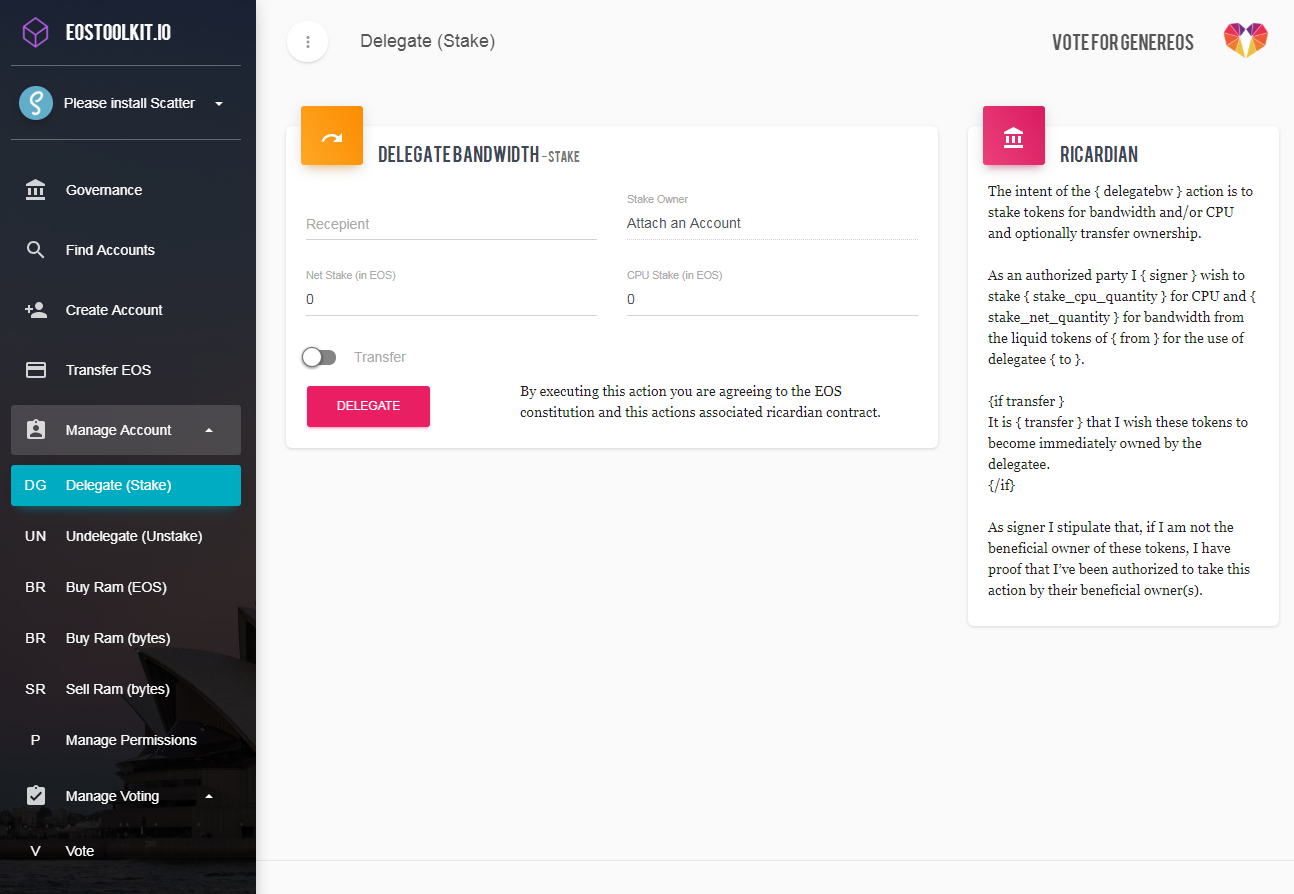
- Head over to http://eostoolkit.io/
- Attach Identity with Scatter (see here for tutorial)
- Enter your creator account name and account name (usually the same) – this can be found in your scatter identity.
- Allocate your NET and CPU in either the Delegate or Undelegate section
- Finally hit the Stake/Unstake button
 Courtesy of EOS Nation
- Head over to http://eostoolkit.io/
- Attach Identity with Scatter (see here for tutorial)
- Enter your account name into buy or sell section – this can be found in your scatter identity.
- For Buying RAM you must include the receiver account and quantity you would like to pay for RAM
- To Sell RAM you must enter the account you wish to receive EOS for sold RAM and the amount of RAM bytes you wish to sell.
- Finally hit the Buy/Sell button
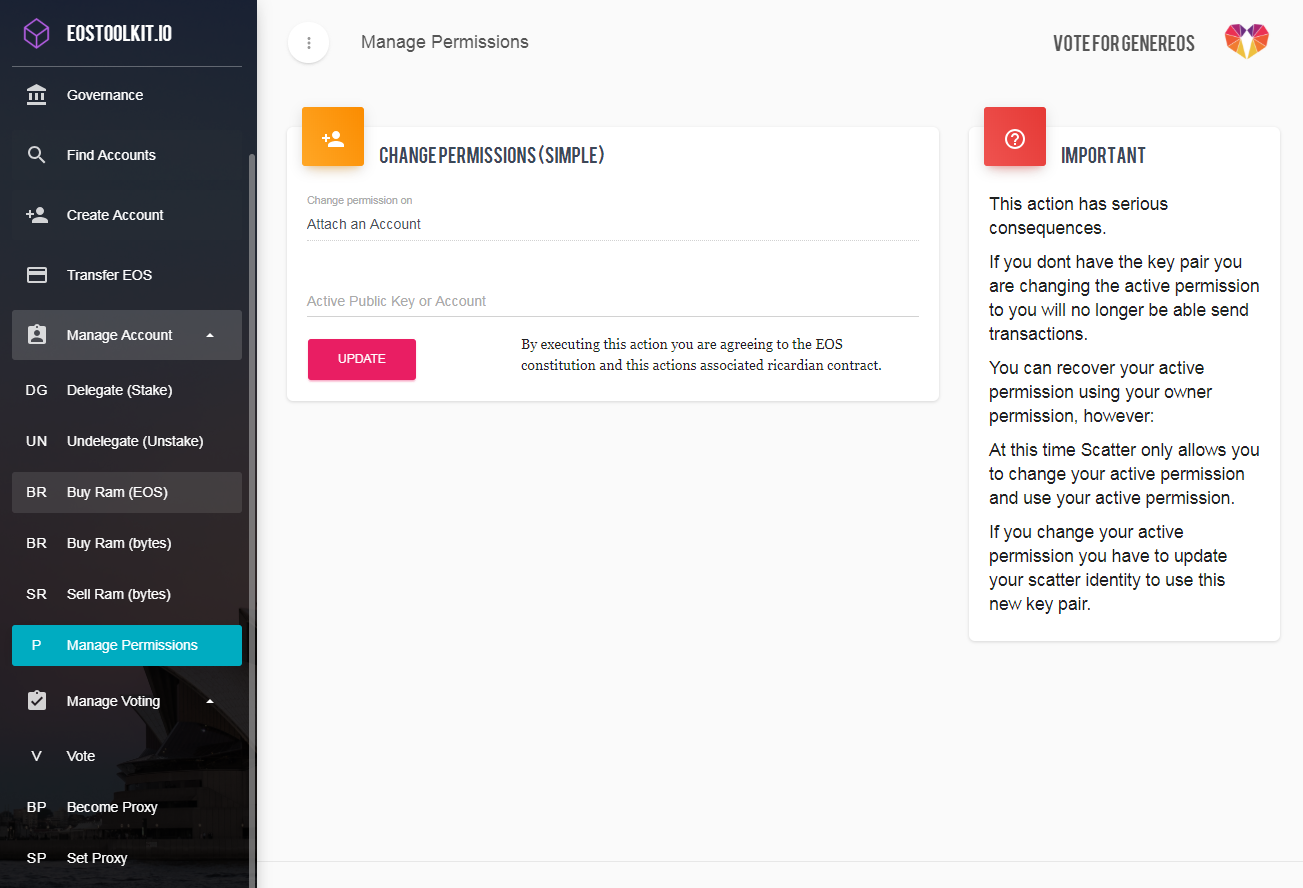
- Head over to http://eostoolkit.io/
- Attach Identity with Scatter (see here for tutorial)
- Enter the account name you want permissions changed from
- Enter the Public Key or Account name you would like permissions changed to
- Finally hit the Update button
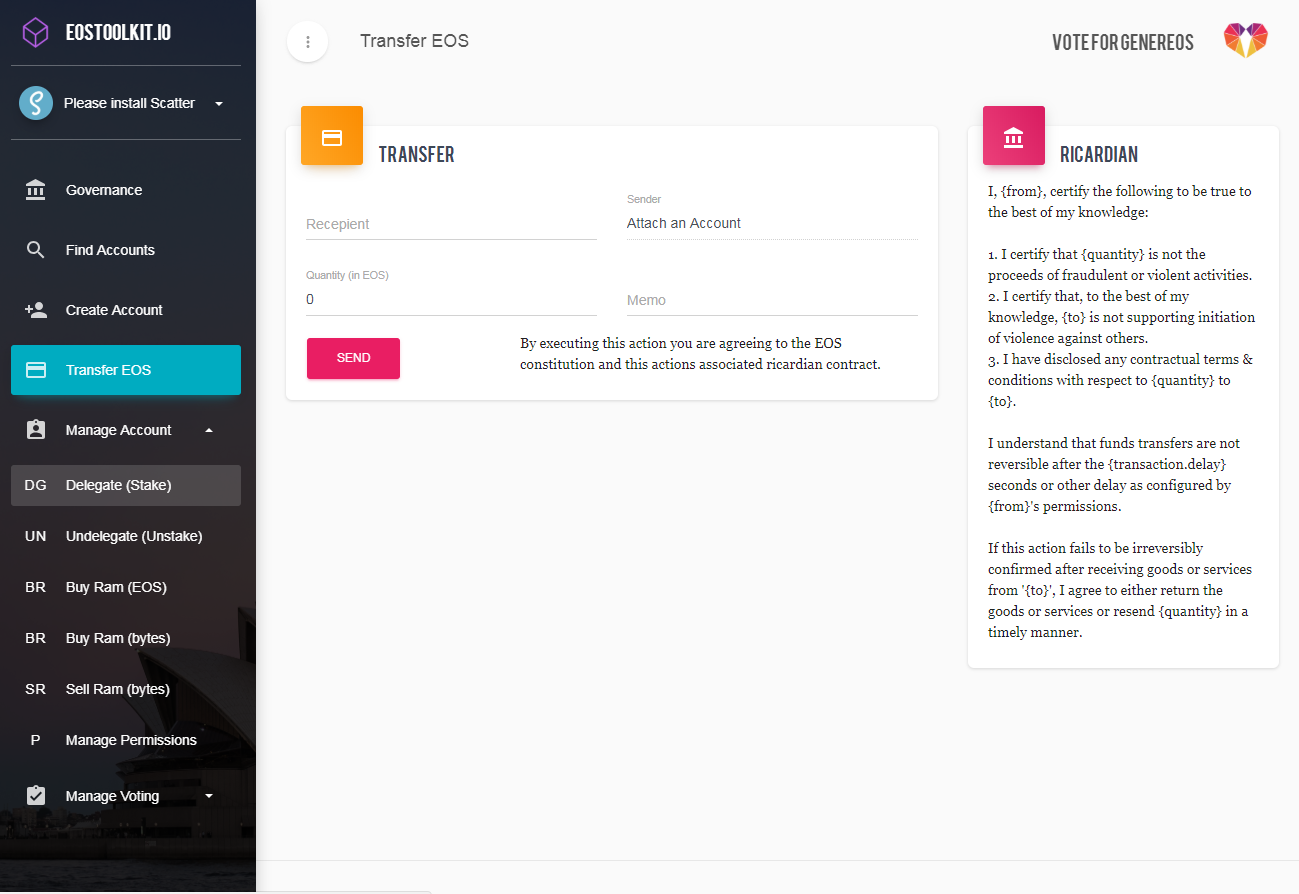
- Head over to http://eostoolkit.io/
- Attach Identity with Scatter (see here for tutorial)
- Enter the account name of the recipient
- Enter the the amount of EOS you would like to transfer
- Finally hit the Send button
GitHub Contributors to our classic toolkit
- EOS Nation (eosnationftw)
- nsjames
Roadmap
- Improved UI
- Multisig permissions
- EOS Tokens balance/transfers
- Multisig transactions
- Dapp/smart contract transaction
- Airdrop tracking
- Block explorer
- Offline desktop version
1 Comment