
Welcome to our guide on transferring EOS tokens to TLOS using the UtilityX Bridge, powered by the Antelope Inter-Blockchain Communication (IBC) protocol. If you want to learn more about IBC protocol do not forget to check out our article covering it in more detail.
Before starting, please ensure that you have the below prerequisites set up:
- Install the Anchor Wallet Dekstop App and make sure it has been updated;
- Create or Import existing EOS & TLOS wallets into the Anchor App
- Make sure you have enough resources on both of the wallets
If you do not have the above configured, it may result in failed transactions. Additional details related to setting up a Telos account are covered in our guide on How to Stake Telos and Participate in Governance.
Let’s dive right in!
Setup Process
First, go to the UtilityX Bridge webpage and select the correct source and destination chain (in our case EOS and Telos).
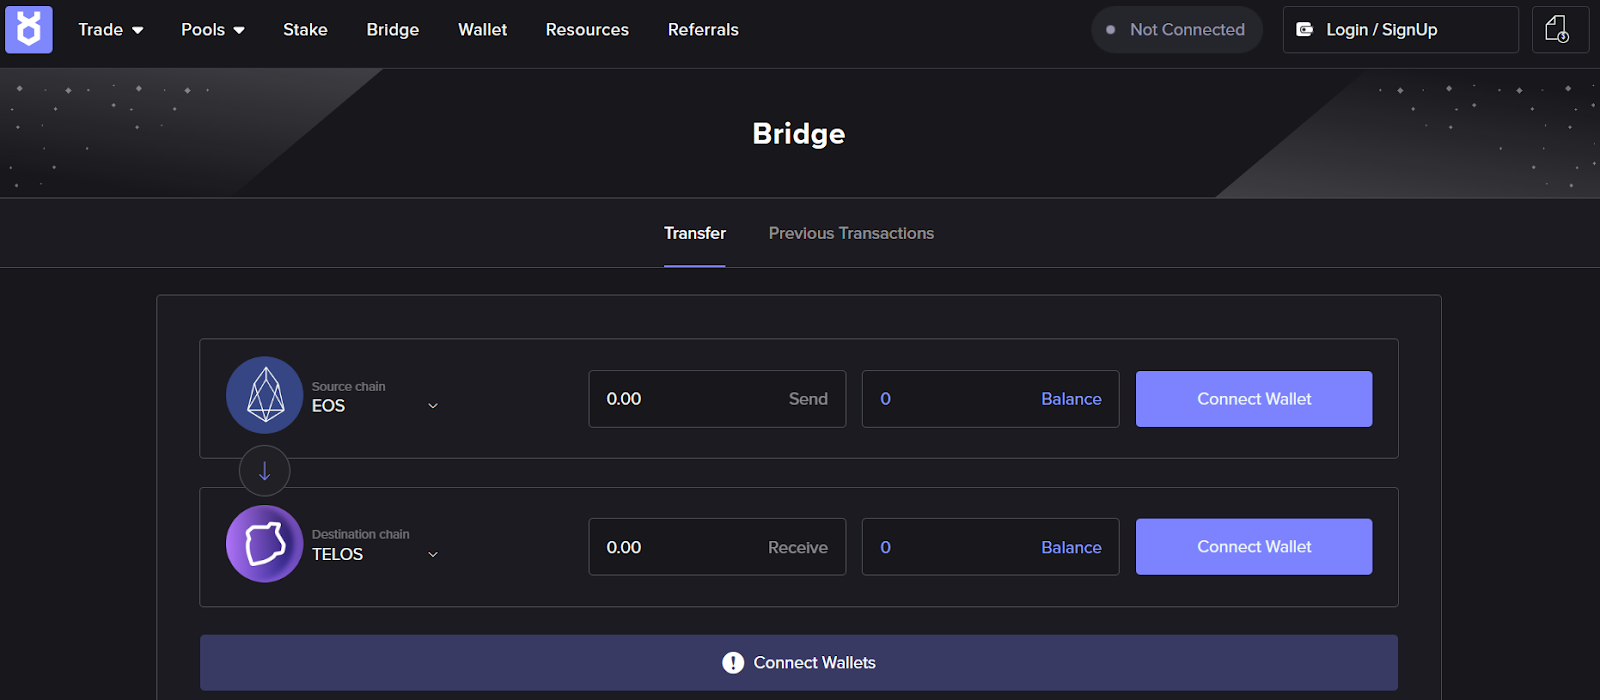
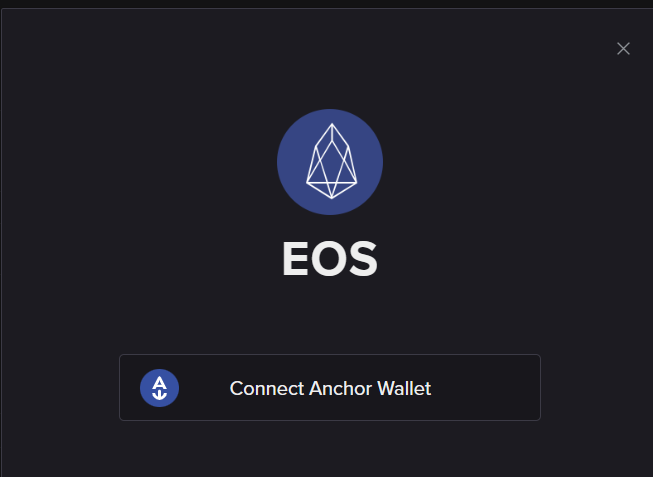
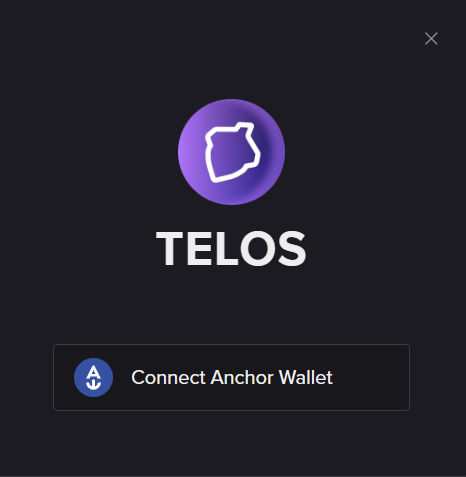
Next, Press the “Connect Wallet” button, both for EOS and Telos, and complete the process by signing the requests as shown below.
Transfer Process
After connecting both wallets to the UtilityX webpage enter the amount of EOS you want to transfer and click the “Transfer” button. Consider sending a small amount first, to be able to test the process and make sure everything works.
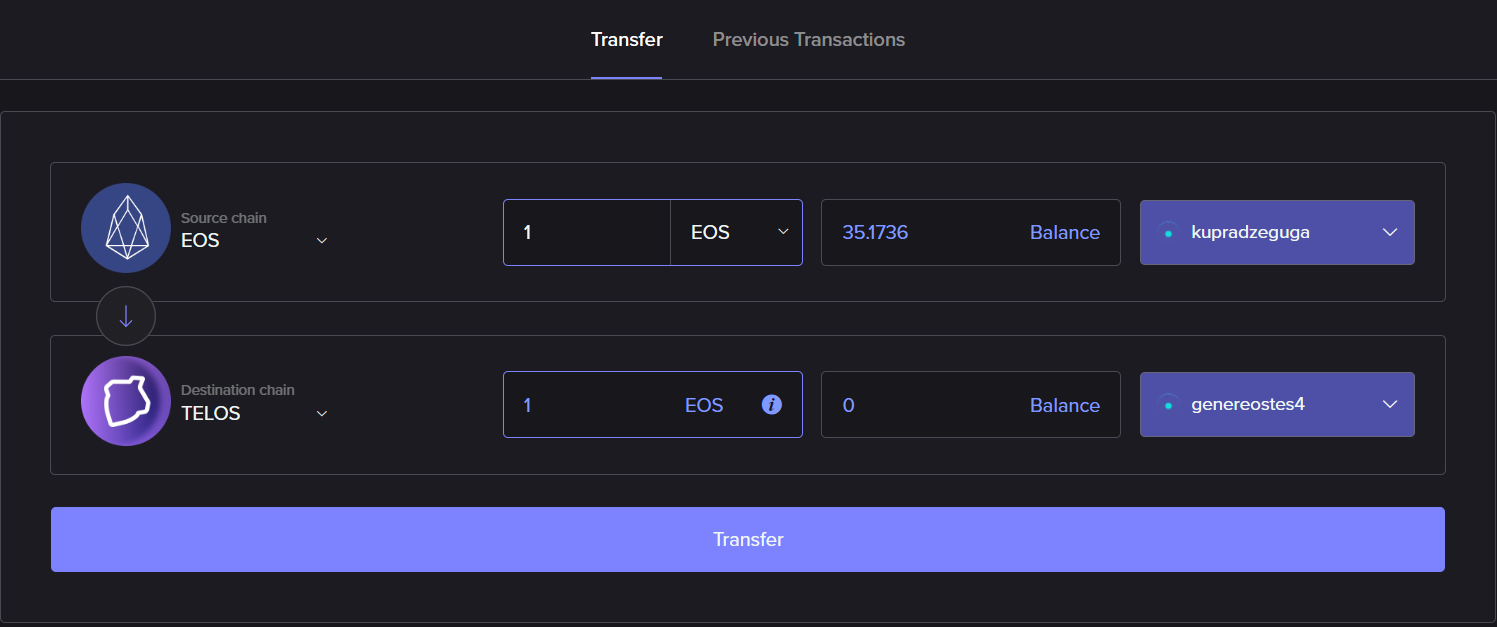
Next, accept the Terms & Conditions, make sure the indicated amount is correct, and click “Execute”.
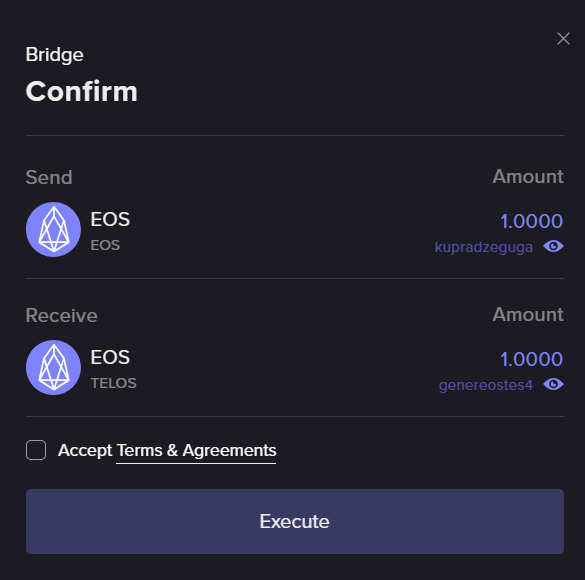
For the next steps, you will need both, Anchor Wallet and the Bridge webpage to be open, until the transaction is not completely executed. You will have to sign two transactions, first for the EOS source chain and second, for the TLOS destination chain (after finality reaches 100%).
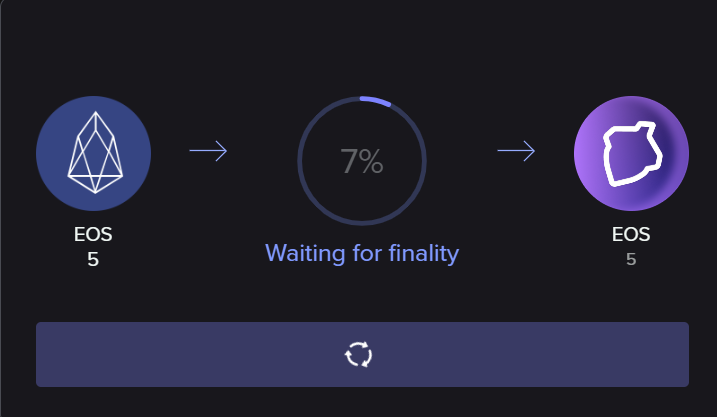
After both transactions and processes reach 100%, the transaction report page will appear with all the transaction details.
Interrupted Transfers
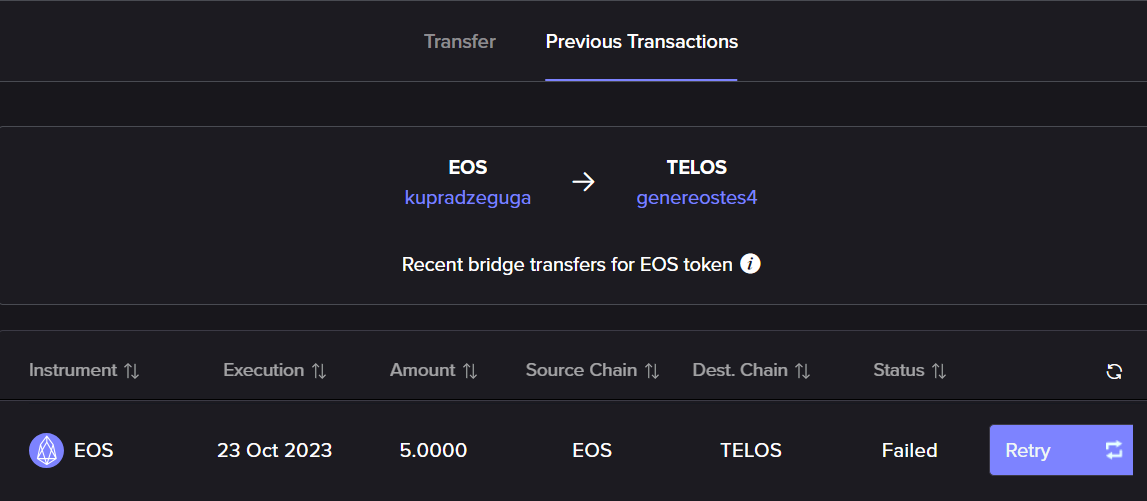
Sometimes, due to some reason, transactions fail. In this type of situation, it is best to make sure everything is correct in terms of resources, token availability, or technical updates and then retry the transaction.
On the same webpage, by clicking on the “Previous Transactions” button you will find TXs with the “Failed” status. Make sure you are still logged in to both accounts and press the “Retry” button to repeat the process.
0 Comments